When you think about upgrading your backyard, a patio is often the first place people start, and for good reason. It creates a functional outdoor space where you can relax, entertain, and actually enjoy your yard. But if you’ve never built one before, it can feel a bit overwhelming.
The truth is, building a backyard patio isn’t just about laying stones or pouring concrete. It’s about what happens underneath. The preparation, the drainage, and the structure that determines whether your patio lasts 2 years or 20.
Here’s a step-by-step beginner-friendly guide to help you understand the process from start to finish.
Step 1: Start With a Clear Plan
Before any digging begins, you need a solid plan. Think about how you’ll use the space. Is it for hosting? A quiet seating area? Maybe a fire pit or outdoor kitchen down the road?
Your layout, size, and material choice all stem from this. A small paver patio for a seating area will have very different requirements than a large concrete pad for entertaining.
Also consider things like sun exposure, proximity to your house, and how water flows through your yard. These factors often get overlooked, but they play a big role in long-term performance.
Step 2: Choose the Right Material
There’s no one-size-fits-all when it comes to patio materials. The most common options are pavers, poured concrete, and natural stone.
Pavers are popular because they’re durable, flexible, and visually appealing. They’re also easier to repair if something shifts. Concrete is more cost-effective upfront and works well for larger, simple spaces. Natural stone offers a premium look but requires more careful installation.
The key isn’t just what looks best, it’s what works best for your property, soil conditions, and budget.
Step 3: Mark and Excavate the Area
Once your design is finalized, the next step is marking out the patio area and excavating the ground.
This is where many DIY projects go wrong. It’s not just about removing a few inches of dirt, you need to dig deep enough to accommodate your entire base system. That usually includes a compacted gravel base, bedding layer, and the patio surface itself.
Depth will vary depending on your material, but cutting corners here almost always leads to sinking, shifting, or water problems later on.
Step 4: Build a Solid Base
If there’s one part of the process you don’t want to rush, it’s this.
A strong, well-compacted base is what keeps your patio level and stable over time. Typically, this involves laying and compacting layers of crushed gravel to create a firm foundation.
Each layer needs to be properly compacted before adding the next. This step is what prevents your patio from settling unevenly after a few freeze-thaw cycles or heavy rains.
Step 5: Plan for Drainage
Drainage isn’t the most exciting part of patio construction, but it’s one of the most important.
Water needs somewhere to go. Without proper grading or drainage solutions, it can pool on your patio or flow back toward your home, leading to erosion or even structural issues.
A slight slope away from structures is usually built into the design, and in some cases, additional drainage systems may be needed depending on your yard.
Step 6: Install the Surface Material
Now comes the part most people look forward to, laying the patio itself.
For pavers, this means placing them carefully on a leveled bedding layer (usually sand), ensuring they’re aligned and evenly spaced. For concrete, it involves forming, pouring, and finishing the slab.
This step requires patience and attention to detail. Even small inconsistencies can affect the final look and feel of your patio.
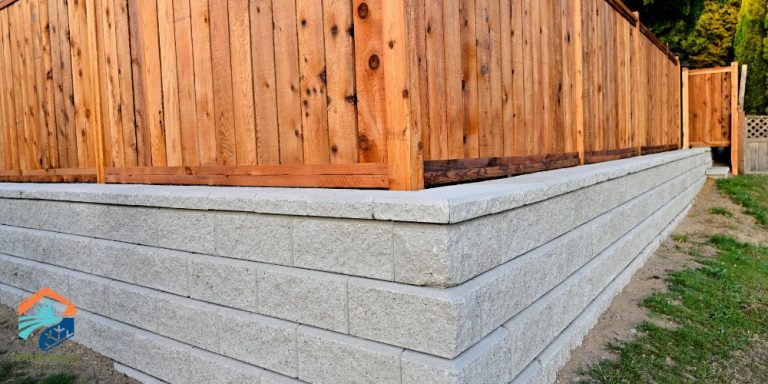
Step 7: Secure and Finish the Edges
Edge restraints are what keep everything in place. Without them, pavers can slowly shift outward over time.
Once edges are secured, joints are filled (often with polymeric sand for pavers), and the entire surface is compacted and cleaned up. This locks everything together and gives the patio its finished appearance.
Step 8: Final Touches and Clean-Up
At this stage, your patio is essentially complete. The final step is making it feel like part of your outdoor space.
This might include adding furniture, lighting, planters, or even features like a fire pit or seating wall. These details turn a simple patio into a space you’ll actually use.
Common Mistakes to Avoid
A lot of patio issues come down to skipping or rushing key steps. Poor base preparation, inadequate drainage, and improper compaction are some of the biggest culprits behind patios that fail early.
It’s also easy to underestimate how much work excavation and base prep really involve. What looks like a simple weekend project can quickly turn into something much more complex.
DIY or Hire a Professional?
Building a patio yourself can be rewarding, especially for smaller projects. But for larger spaces, complex layouts, or properties with drainage challenges, working with professionals can save you time, money, and headaches in the long run.
A properly built patio isn’t just about appearance, it’s about longevity. When the groundwork is done right, everything else falls into place.
Bringing It All Together
A backyard patio is one of the best ways to extend your living space outdoors. But the difference between a patio that lasts and one that doesn’t comes down to preparation, materials, and attention to detail.
If you’re planning a patio in Chilliwack or the surrounding Fraser Valley, taking the time to do it right, or working with a team that understands local conditions, can make all the difference.
Thinking about building a patio but not sure where to start? It’s always worth getting expert input early on to make sure your project is set up for success from the ground up.